If you're new to growing microgreens or looking to improve your current setup, this guide will show you how to maximize your growth with a high-quality smart kit. Microgreens are packed with nutrients and let you enjoy growing your own food in a small space. A smart kit makes the process easier, giving you everything you need to grow healthy greens with minimal effort.
Why Choose a Smart Microgreen Kit?
Using a smart kit changes the game when it comes to growing microgreens, especially if you're aiming for consistent, year-round growth. Here's what makes this kit stand out:
✅ Effortless Root Cleaning: No more struggling to clean up roots after each planting cycle. The kit’s one-second root-cleaning feature simplifies the entire process, making reuse quick and easy.
✅ Safety and Practicality: I always appreciate knowing my greens are grown safely. The kit is crafted from food-safe materials, so I never have to worry about chemicals leaching into the soil or water. It’s designed for both safety and convenience, ensuring that I can focus on growing without extra concerns.
✅ Efficient LED Lighting: Equipped with a built-in timer, the LED lighting in this kit takes all the guesswork out of lighting schedules. I simply set the timer, and it automatically provides the right amount of light each day, optimizing growth without needing to adjust manually.
✅ Adaptable Cultivation Methods: Whether you prefer hydroponic or soil-based planting, this kit supports both methods. This versatility allows you to tailor your setup to your space and preferences, ensuring healthy growth in any indoor environment.
✅ Convenient Germination Cover: During the germination phase, a black cover/lid comes with the kit, eliminating the need for extra shading tools. This cover supports faster and more even germination, a crucial step in growing healthy microgreens.
✅Eco-Friendly Grow Bags: Transplanting seedlings is simple with the included eco-friendly grow bags. In just three seconds, I can remove seedlings to share with friends or replant, making it easier than ever to expand my growing setup.
>>>Click here to learn more details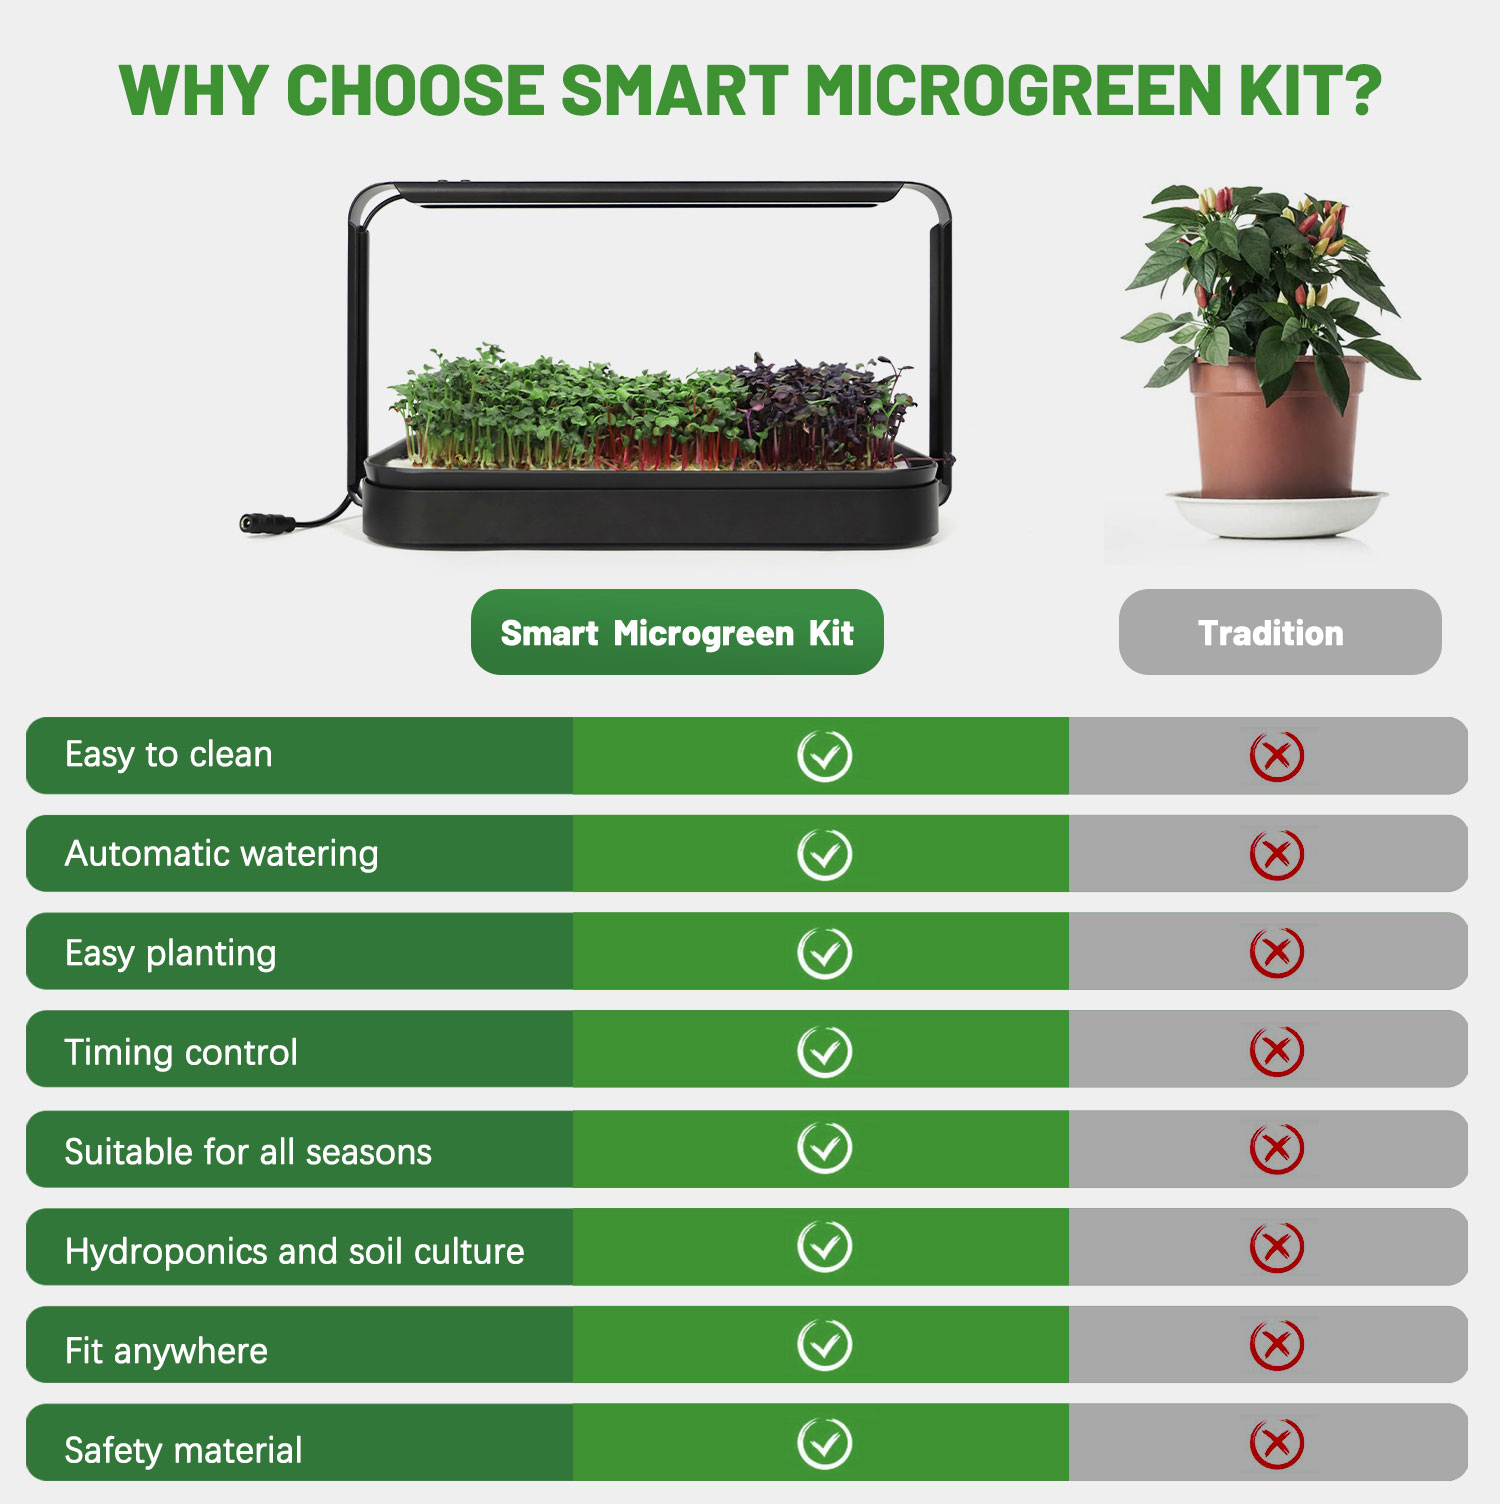 How To Grow Microgreens?
Now, let’s dive into the planting process. The kit makes it straightforward, but each step matters in achieving the best growth possible.
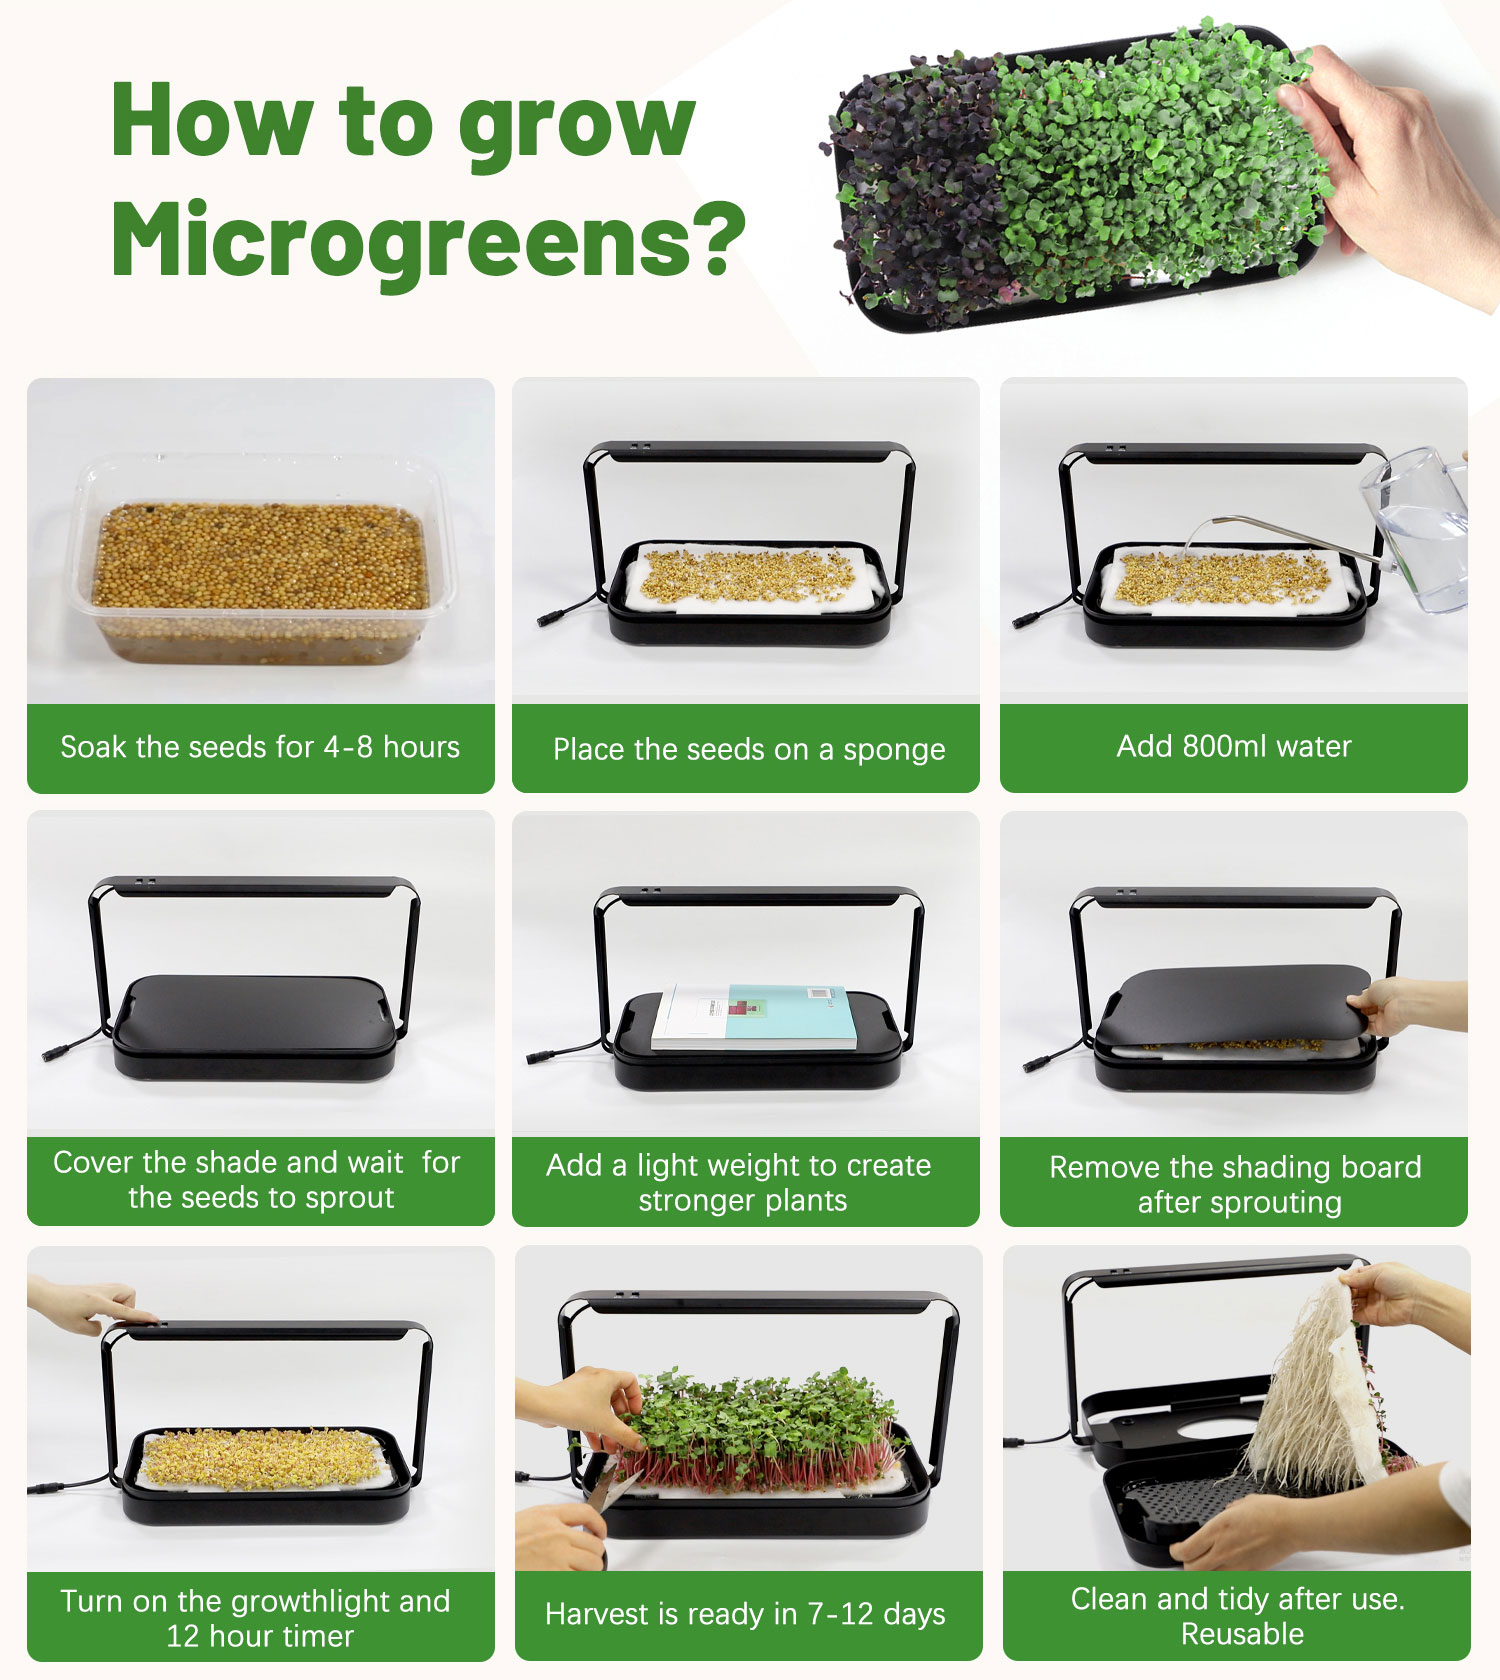 1. Soak the Seeds
Rinse: Start by rinsing the seeds with cold water. This removes any contaminants on the seed shell.
Pre-Soak for Extra Cleanliness: If your growing area has high humidity or poor airflow, soak your seeds in a mix of 250ml (1 cup) water and 1 tablespoon (15ml) of 3% food-grade hydrogen peroxide or white vinegar for five minutes. This helps prevent bacteria from growing on the seeds. After soaking, rinse the seeds well.
2. Prepare for GerminationSpread and Press: Spread the soaked seeds on absorbent cotton in the kit. Add 800ml of cold water, cover with the kit’s black germination lid, and place a book weighing around 650g-1000g on top. Pressing helps make sprouts grow thicker and more evenly.
Water Monitoring: Check the water level regularly, ensuring it’s flush with the round hole of the drain pan.
3. Prevent MoldDaily Spraying: Mix 250ml of water with one tablespoon of food-grade hydrogen peroxide or vinegar and pour it into a spray bottle. Lightly spray the seeds morning and evening, and cover them again. This prevents mold during germination.
4. Maintain Ideal ConditionsAirflow: Keep sufficient airflow around your setup, as stagnant air can lead to mold and reduced yield.
Temperature: Aim for an ambient temperature between 60°F-75°F (15°C-23°C) during germination. For sprout growth, a slightly warmer range of 75°F-82°F (24°C-28°C) accelerates development.
5. Light and GrowthLighting Schedule: Once sprouts begin emerging, remove the shade cover and switch on the LED lights, setting the timer for about 12 hours a day. The consistent light helps support healthy growth.
Harvest: When the sprouts reach about 6-8cm, they’re ready to harvest! Use scissors to snip the greens at the base.
6. Clean and RepeatRoot Cleaning: After harvesting, tear off the absorbent cotton and wash the kit’s black plate thoroughly with clean water. Dry it before starting the next round of planting.
Why Temperature Matters for Microgreens?
Microgreens grow best in warm temperatures, ideally between 24°C and 28°C (75.2°F-82.4°F). This range closely resembles natural conditions, stimulating seeds to sprout faster. Warmer temperatures speed up germination, yielding vibrant, nutritious greens that pack intense flavor. By maintaining the right warmth, you’ll notice quicker growth cycles and a higher overall quality of microgreens.
Growing microgreens at home adds fresh flavor and valuable nutrients to my meals, all from a compact, manageable kit. With each planting, I watch these tiny seeds transform into beautiful greens, knowing I’ve grown them safely and efficiently. I hope you find this guide helpful for getting the most from your smart kit—happy growing!


